Hello everyone, long time no see.
For this post I'll be making a full run-through of my dog character since I haven't had the time to activelly work on writting the blog, I have a very fun project that will be soon be released on kickstarter and I will be posting about it very very soon as long as updates on my fmp brief that's left.
Returning to the matters at hands, as you can tell this character its different... because it's not a character, its a creature! HAZZAH! After some interesting feedbacks I received I was aware that we could actually include creatures in the FMP and I esthoic, live was good yadda yadda, finally a chance to do my creepy crawlies, except they couldnt be too crazy, so I ended up inspiring myself in something grounded, like a zombie dog, and conviniently Resident Evil 2: Remake had just come out and it was a source of great inspiration with those savage puppies running around jumping for your neck, but in order to be different I made sure to choose a different breed of dog as well as changing the design and making some original decisions.
And so it began, a jorney of studying canine anatomy before I could even start sculpting, making sure not to misinterprete anything as I went, as you can see in the image bellow I made sure to exagerate every muscle to get a feeling for the proportions and shape of the breed (Rottweiler).

After having finalized the very basic sketch I proceeded to make a base with some of the details that would be present in the final sculpt and fix the proportions while smoothing the muscles going for a more realistic mood.

When that was done I added the final steps of the smoothing for the base as well as fixing the head anatomy, which was somewhat tricky to achieve, my method for working around an animal's head is layering it as you would in real life, starting with a very basic bone structure and adding the teeth and eyes, to which I will add levels of muscle and skin after, paying close attention to each individual bit, the challenge being that I need to make sure that each part makes sense and connects to each other properly, the hard part in the design I made was to make the destroyed tissue looked realistic enough and trying to get a reference without going "Oh no, poor doggie..." was surprisingly hard, but that's part of the job and it had to be done.
There are a number of good skinning and bone washing videos on youtube and you'd be surprised on the amount of reference they provide.


The final step of the sculpt was to polish, ad some unique details and show where each texture would be placed, there were some bits and bobs that could have been better sculpted but since they would be covered by textures in the "game readying process" I decided to not pay too much attention to them, this step is still important as it can help showcase your work and sculpting skills.

One of the things I made as a extra goal for this brief was to experiment with fibermesh and try to bake it onto the creature, if it is something that I've learned was that less is more, a high density fibermesh will look amazing when rendered but it is not optimal for baking as you're going to have a huge number of lighting errors and the overall look will be too noisy, but after fiddling with it I found a good safe amount and the results were interesting.
Here are some renders of the final sculpt.

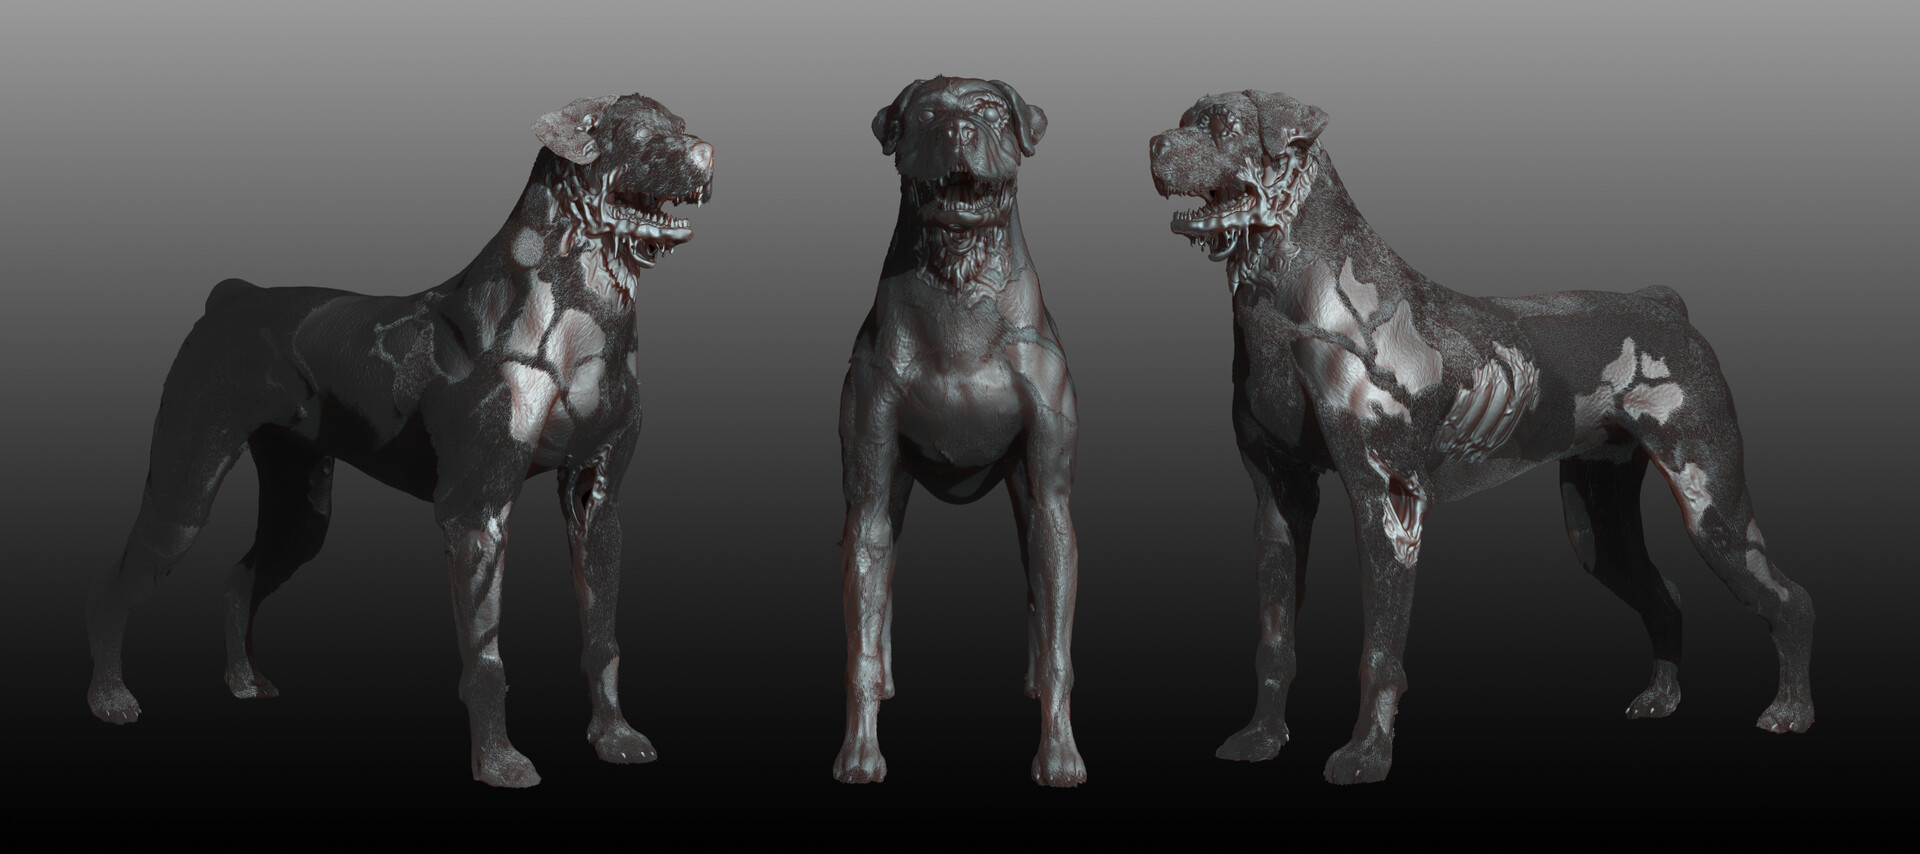
After the sculpt the rest of the process was pretty standard. In the picture bellow you can see the final result with the topology and the textures.

Overall it was a really interesting project and a breath of fresh air since it's something I am passionate about and would like to work with in the industry, one step closer to my goals.
As always, if there are any questions about the process I am always happy to answer in the PMs.
Sam over and out.


